> ## Documentation Index
> Fetch the complete documentation index at: https://docs.nebulaclient.net/llms.txt
> Use this file to discover all available pages before exploring further.
# Building the Alchemy Machine
> Step-by-step guide to building the alchemy machine schematic for automated potion brewing.
The alchemy machine is a structure you build on your Private Island that allows the Alchemy Macro to automatically brew potions.
## Materials
| Block | Amount |
| -------------------- | ------ |
| Quartz Block | 59 |
| Brewing Stand | 11 |
| Hopper | 44 |
| Chest | 12 |
| Trapped Chest | 10 |
| Magical Water Bucket | 1 |
## Step-by-Step Build Guide
### Step 1 — Build the Floor
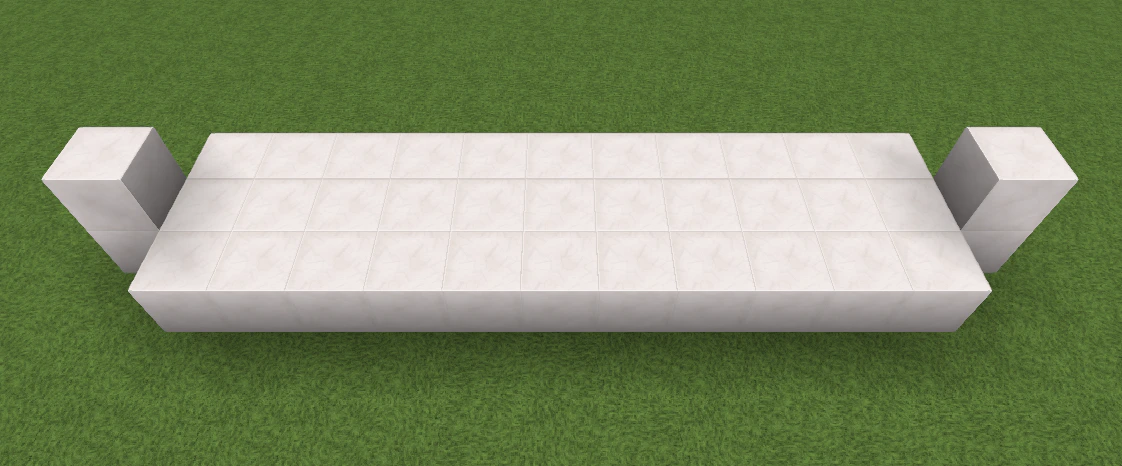
Place a **3×11 quartz block floor**. This is 3 rows wide and 11 blocks long.
### Step 2 — Add Side Rails
Place a quartz block on **each side** (left and right long edges) to prevent the player from falling off the machine while using it.
 ### Step 3 — Place Hoppers Behind Brewing Stands
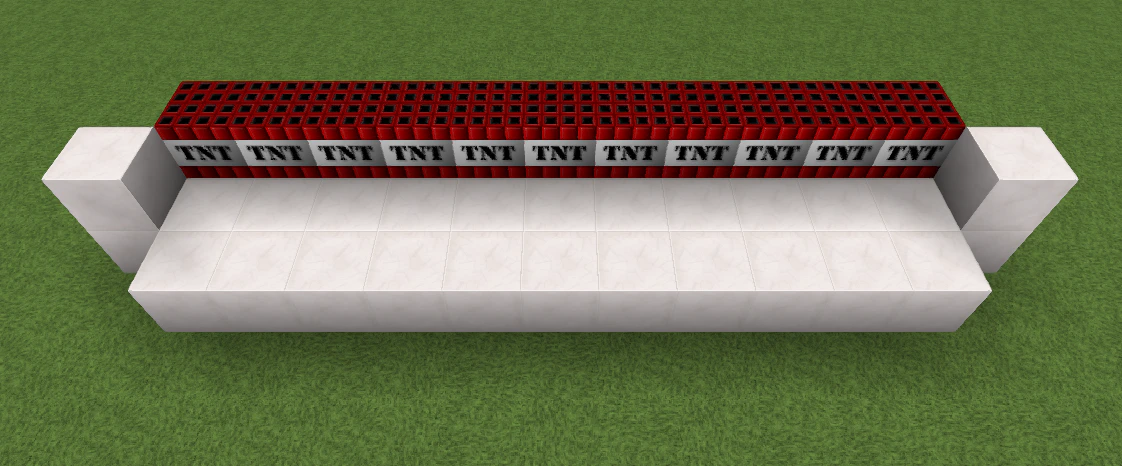
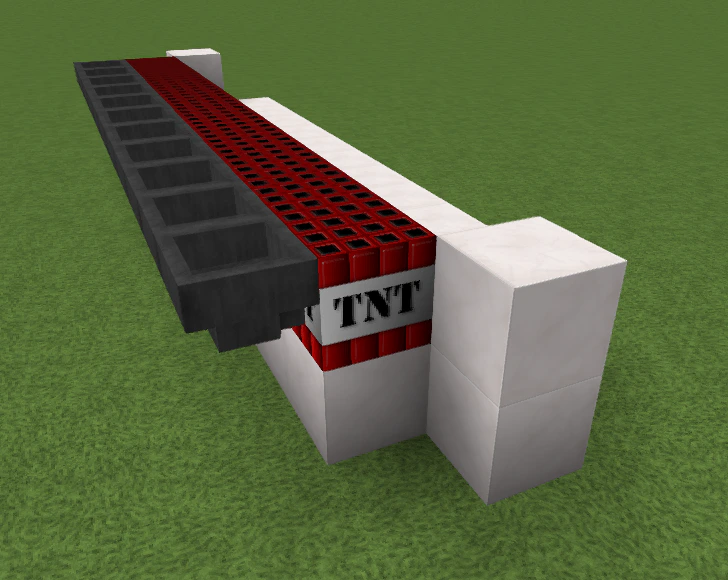
Place **temporary blocks** along the further long edge of the floor (where the brewing stands will go). Then place **11 hoppers** behind these temporary blocks, sneaking and clicking on the temp blocks so the hoppers connect to them (face toward the brewing stand row).
### Step 3 — Place Hoppers Behind Brewing Stands
Place **temporary blocks** along the further long edge of the floor (where the brewing stands will go). Then place **11 hoppers** behind these temporary blocks, sneaking and clicking on the temp blocks so the hoppers connect to them (face toward the brewing stand row).
 ### Step 4 — Place Brewing Stands
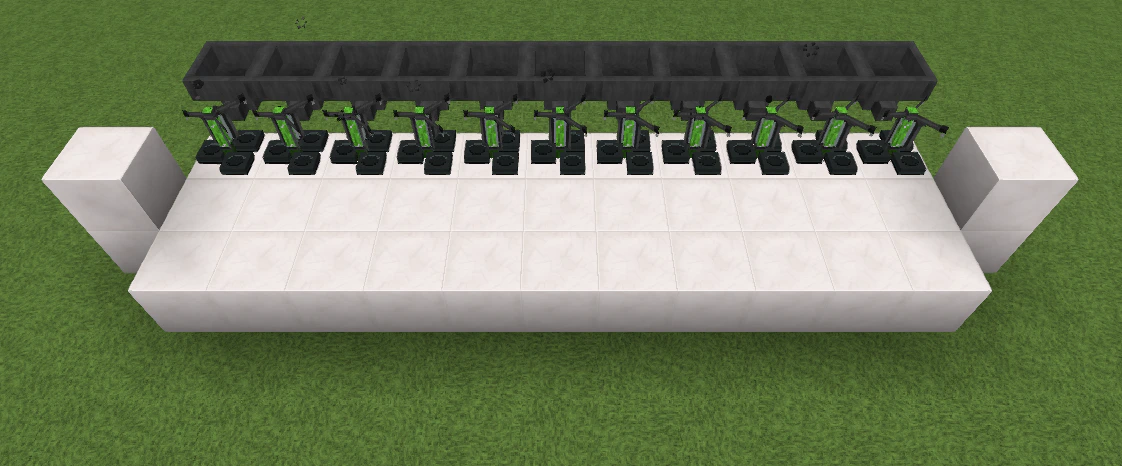
Remove the temporary blocks and place **11 brewing stands** in their place, on top of the quartz floor. The hoppers from the previous step should now feed into the brewing stands.
### Step 4 — Place Brewing Stands
Remove the temporary blocks and place **11 brewing stands** in their place, on top of the quartz floor. The hoppers from the previous step should now feed into the brewing stands.
 ### Step 5 — Place Chests
Place **double chests and trapped double chests** alternating next to each other on top of the hoppers — normal chest, then trapped chest, then normal chest, then trapped chest, and so on. Alternating between regular and trapped chests allows them to be placed side by side without merging.
### Step 5 — Place Chests
Place **double chests and trapped double chests** alternating next to each other on top of the hoppers — normal chest, then trapped chest, then normal chest, then trapped chest, and so on. Alternating between regular and trapped chests allows them to be placed side by side without merging.
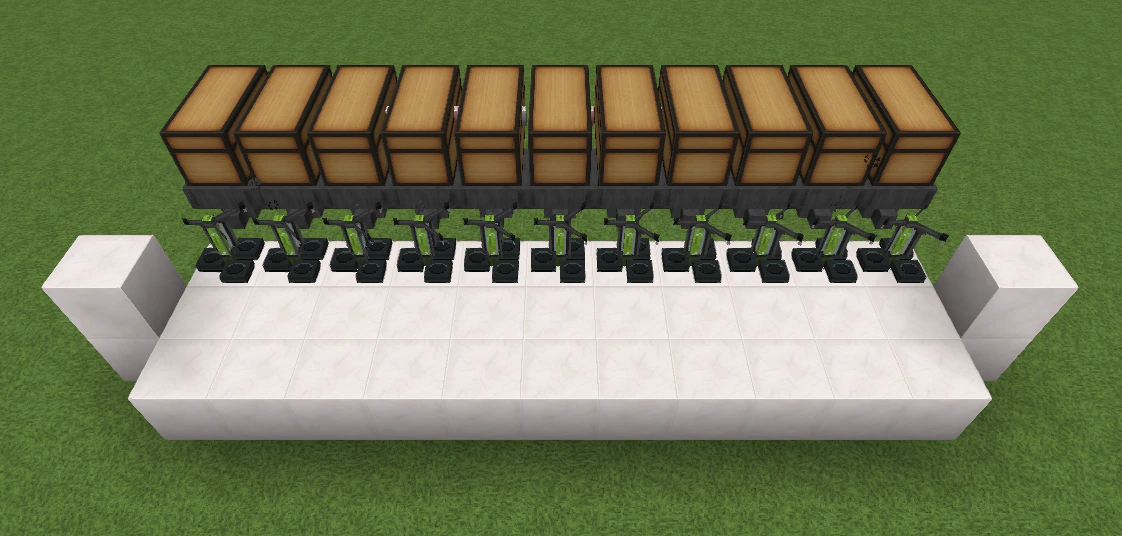 ### Step 6 — Place First Row of Hoppers
Place **1 row of 11 hoppers** directly on top of the chests. These hoppers face down into the chests.
### Step 6 — Place First Row of Hoppers
Place **1 row of 11 hoppers** directly on top of the chests. These hoppers face down into the chests.
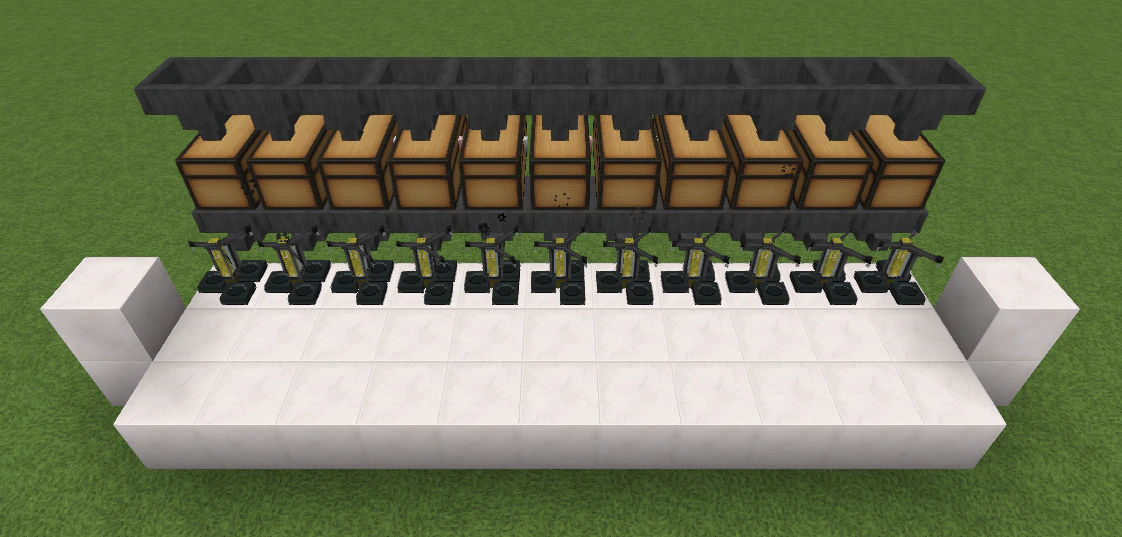 ### Step 7 — Place Circular Hopper Rows
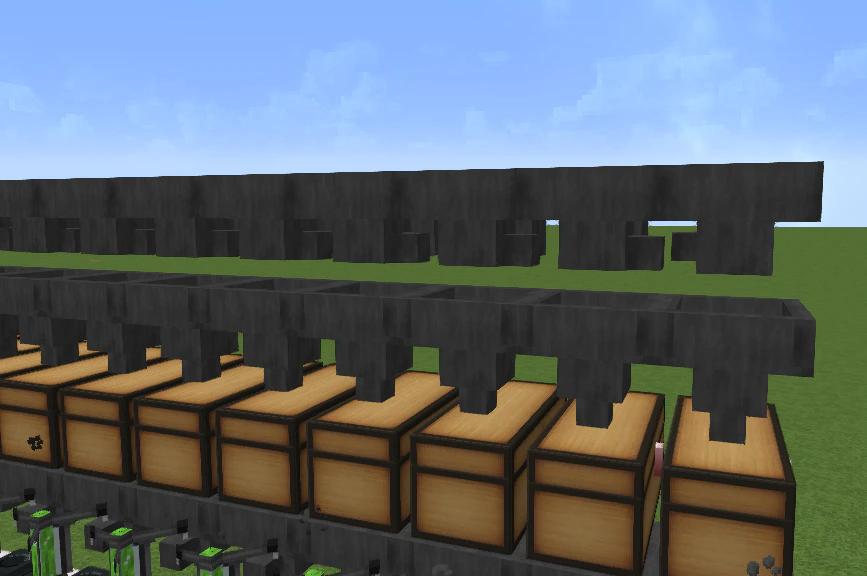
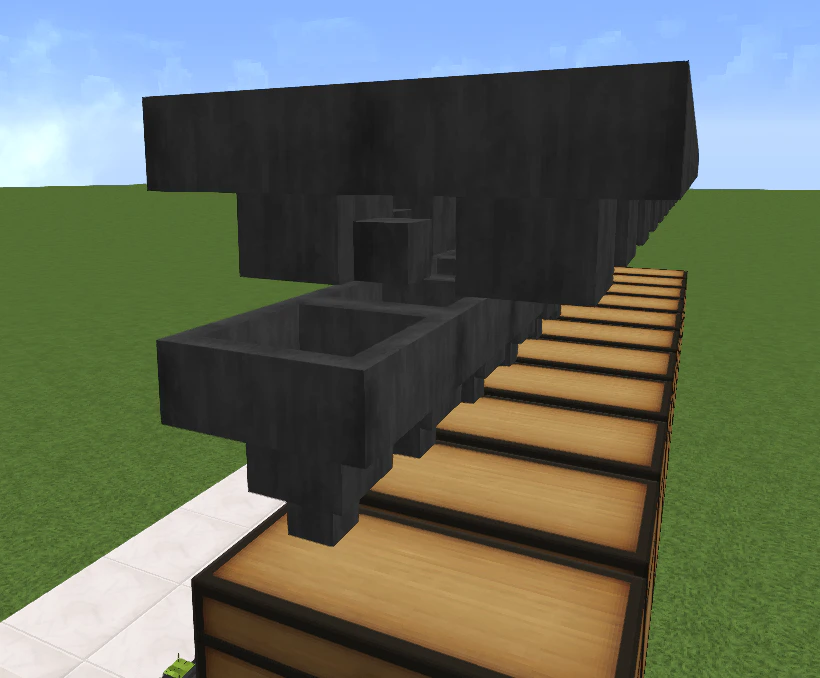
Place **2 rows of hoppers** on top of the previous row in a **circular pattern**. This creates a loop so items flow in a circle, putting water bottles across all chests below.
### Step 7 — Place Circular Hopper Rows
Place **2 rows of hoppers** on top of the previous row in a **circular pattern**. This creates a loop so items flow in a circle, putting water bottles across all chests below.
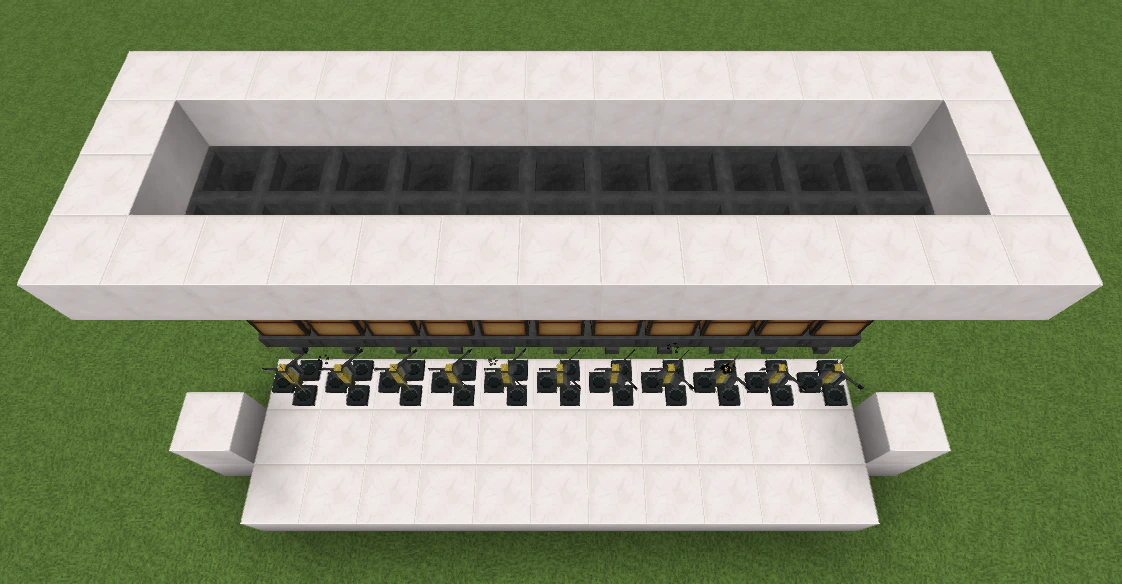
 ### Step 8 — Build Walls
Build a **1-block-high quartz wall** around the top hopper area — front, back, and both sides.
### Step 8 — Build Walls
Build a **1-block-high quartz wall** around the top hopper area — front, back, and both sides.
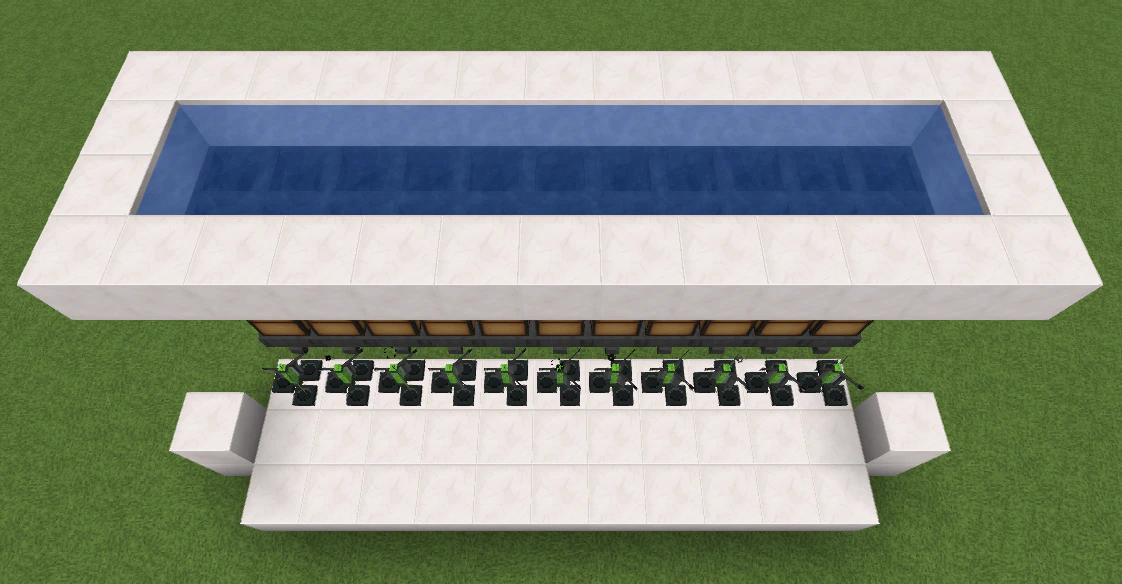
 ### Step 9 — Fill with Water
Use the **Magical Water Bucket** to fill the enclosed area with water. This is where you'll stand when using the Bottle Filler macro to fill water bottles.
### Step 9 — Fill with Water
Use the **Magical Water Bucket** to fill the enclosed area with water. This is where you'll stand when using the Bottle Filler macro to fill water bottles.
 ## Structure Overview
From bottom to top, the machine consists of:
| Layer | Contents |
| ----- | -------------------------------------------------------------------- |
| 1 | 3×11 quartz blocks |
| 2 | 11 brewing stands + 11 hoppers feeding into them |
| 3 | Alternating chests and trapped chests (2 rows of 11) |
| 4 | 11 hoppers feeding down into chests |
| 5 | 2 rows of circular hoppers (items loop to distribute evenly) |
| 6 | Quartz walls + water pool (player stands here and fills the bottles) |
## Structure Overview
From bottom to top, the machine consists of:
| Layer | Contents |
| ----- | -------------------------------------------------------------------- |
| 1 | 3×11 quartz blocks |
| 2 | 11 brewing stands + 11 hoppers feeding into them |
| 3 | Alternating chests and trapped chests (2 rows of 11) |
| 4 | 11 hoppers feeding down into chests |
| 5 | 2 rows of circular hoppers (items loop to distribute evenly) |
| 6 | Quartz walls + water pool (player stands here and fills the bottles) |